Showing posts with label COVID Lockdown games. Show all posts

Wednesday, 2 September 2020

Mokra 1939 - part 3


The final part of the action commences with 19 Uhlans wandering about in the open.  Behind the German front line but still - is it wise?

Meanwhile in the woods, I/Schtz Rgt 12, having fought through one position turn SE to confront the other half of the Polish rifle battalion and a stray cavalry squadron.  More blood is spilled.
One of the game's more exciting moments was the attach by III/Pz Rgt 36 on the Polish armoured train.  The Poles fought bravely....

...but the new technology triumphed.  A predictably tragic first outing for my train.

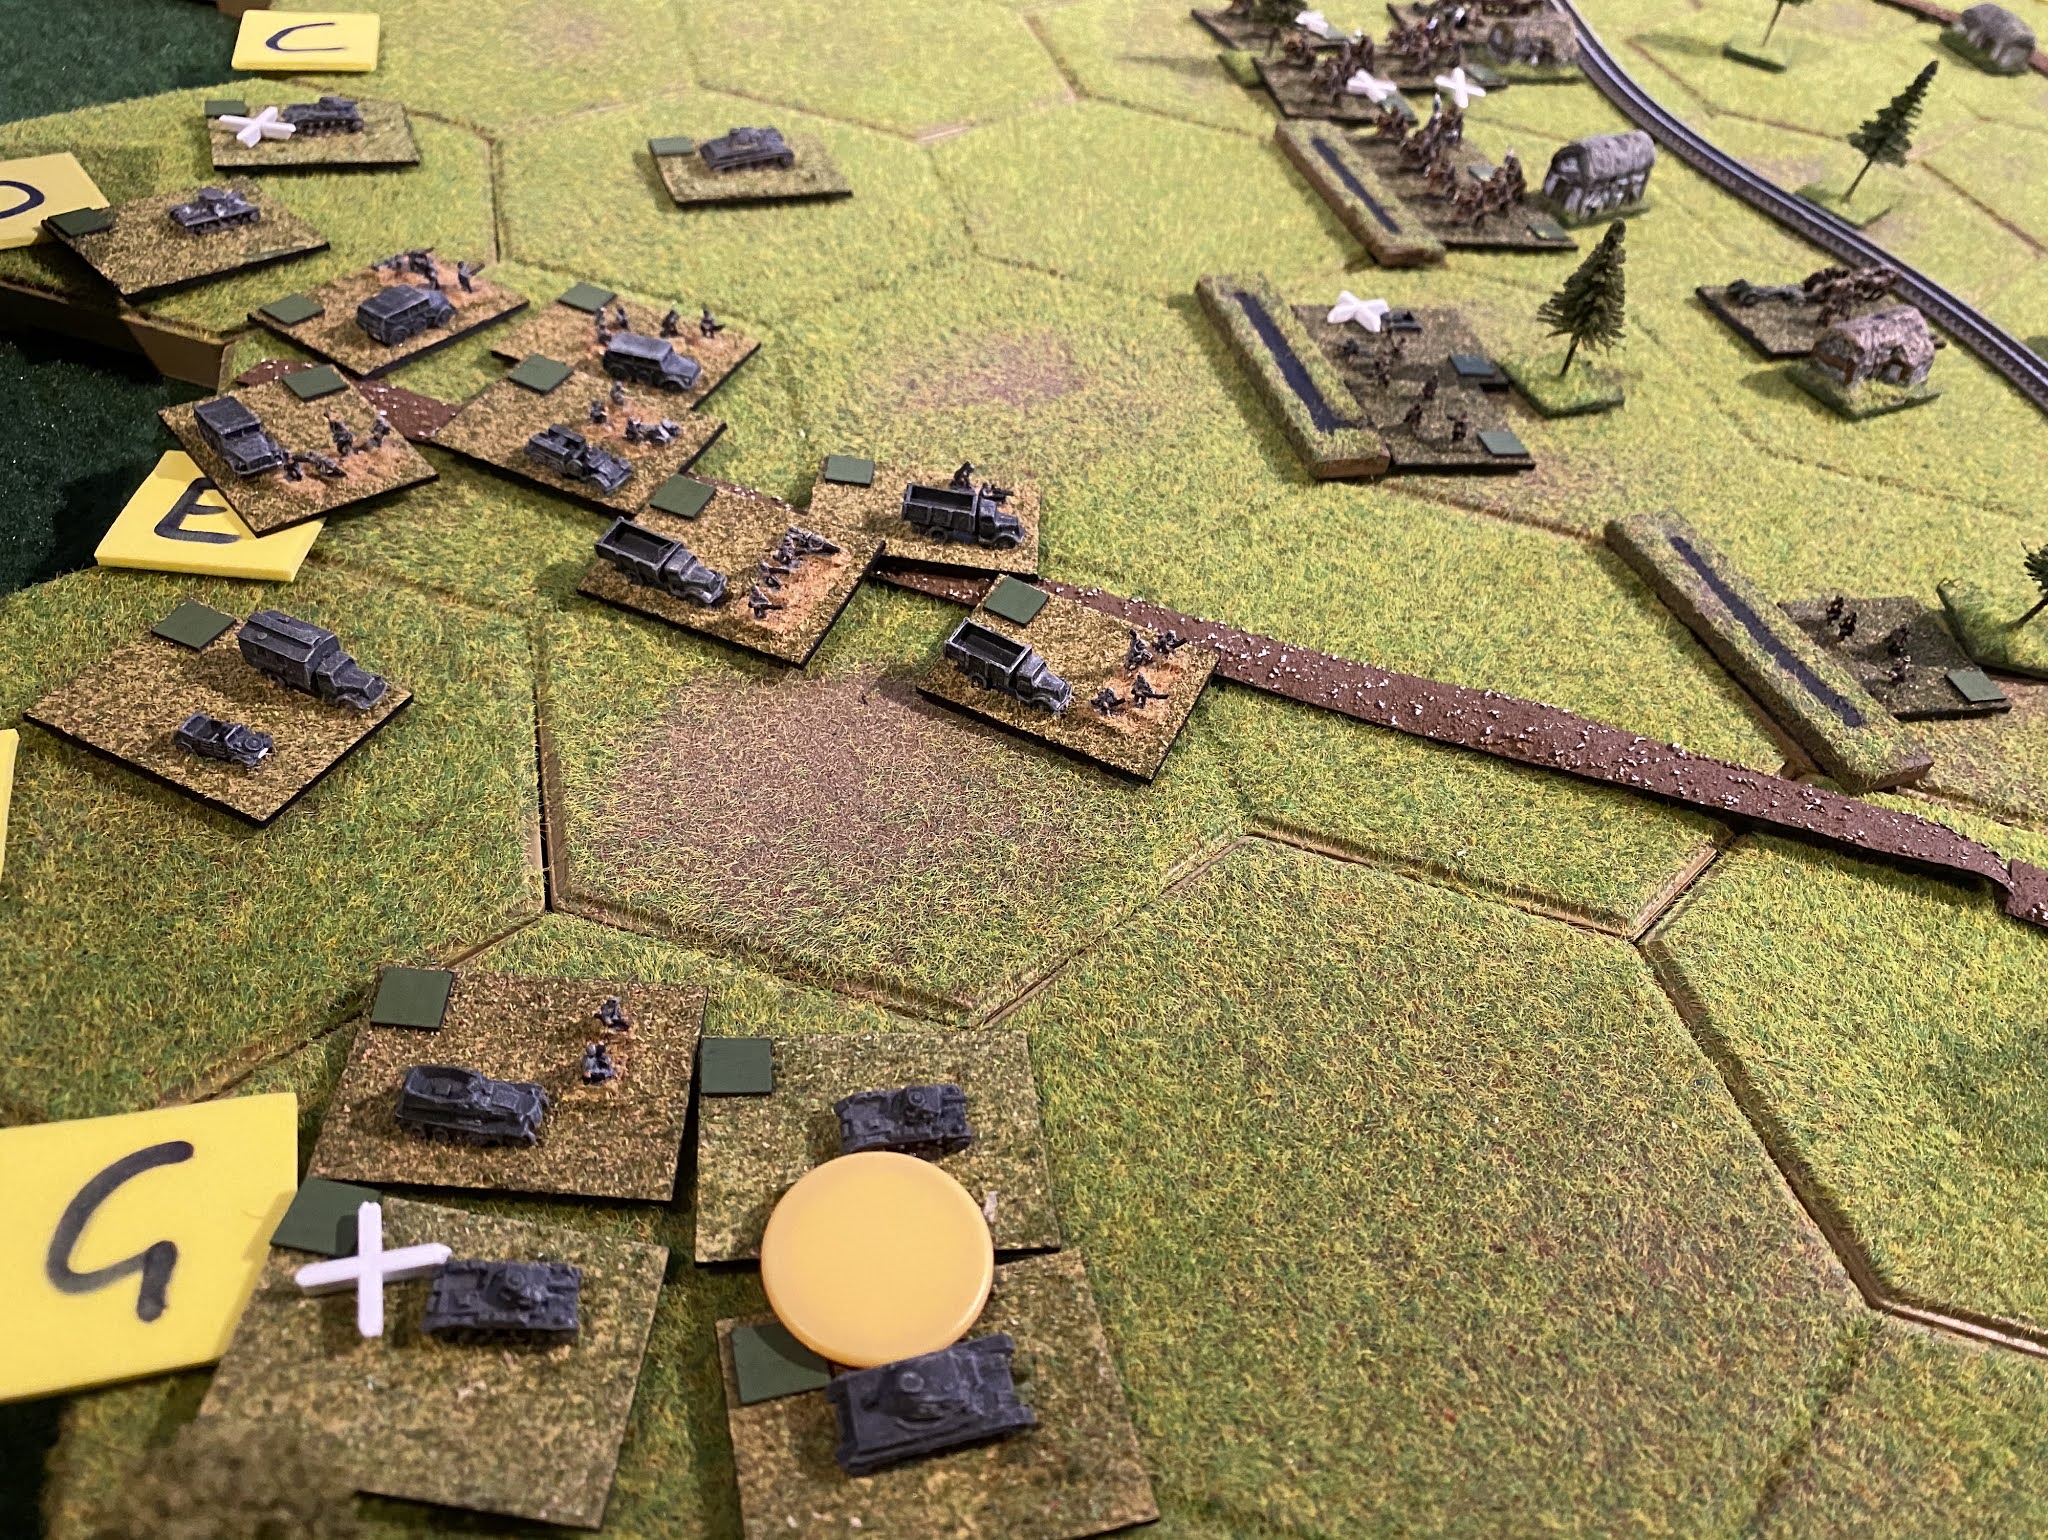
Martin had gathered the remains of Pz Rgt 35 into a single detachment and led them in person against 2nd Mounted Rifles.  Who were in fact dismounted.  Clear?  Good.
Blood flowed freely on both sides.
At this point we decided to draw to a close.  The Poles had carried out a determined defence but were being pushed back and had lost control of the railway line.  They'd lost their 'armour', a cav sqn, train  and infantry btl, and a further two cav sqns were looking a bit ropey.
On the other hand, 4 Panzer Div had suffered least the 150 tanks disabled in the historical engagement.  Leaving it with about two Panzer btls and a schtz btl.  Ouch!
For fun we resolved the fight between Pz Rgt 35(-) and 2 Mounted Rifles.....
In which Martin's brave lads prevailed!  A most enjoyable game (in my view) and a broadly historical result - both side managed to do slightly worse than their historical counterparts!
A quick note on the troop representation.  I gave each of the Panzer Rgts three battalions  - they should in fact have two larger btls each.  This was something of a contrivance to force the Germans into the piecemeal attacks which 4PD actually carried out.  Sure enough it resulted in some very shot-up units.  The Polish cavalry regiments were a challenge, composed as they were of four smallish squadrons and a MG sqn.  I decided to represent them as two fairly chunky stands per rgt.  They were quite tough due to high morale, good training and wide issue of a fairly dangerous AT rifle.  Dangerous to the the tin-foil armour of 1939 panzers at any rate.  Finally, the train had two artillery cars, each with 2 75mm guns, and a company of infantry so I treated it for combat purposes as a weak artillery unit with similar close-combat capabilities as an infantry stand.

A further visit to Poland may be in order in a few weeks.

Friday, 28 August 2020

Mokra 1939 - part 2

Having played through the first few turns on Tuesday evening, we gathered (virtually) again the following night. It was a sufficiently busy evening that I will spread the remaining report over two posts.

This btl of Pz Rgt 36 got off to a good start by getting stuck into the Polish armoured car squadron.

In a bloody exchange the Poles died heroically, taking the remains of the PzII company with them.

Meanwhile Simon had arrived at the helm of Schtz Rgt 12.  Here are the chaps climbing out of their trucks on the road.

Having killed off the armoured cars, the plucky PzI co found itself in range of the armoured train's guns!
More gratuitous train porn
Having reinforced the front line the Poles were looking pretty solid...
...so it was all down to the infantry.  Simon had deployed both battalions ready to assault the Polish infantry positions.

The attack of I/Schtz Rgt 12 went rather well and  - at the cost of a company-worth of casualties they carried the position.
II/Schtz Rgt 12 on the other hand were not feeling it.  On being ordered to attack they promptly failed their morale check and fled back to their furious Rgt HQ.
But help was at hand - or was it.  The Stukas reappeared and maintained their unbroken record of not hitting anything.  Another triumph for the Polish air defence technique of shouting and waving cavalry sabres!
Encouraged by the German reverses, Jerry saddled up 19 Uhlans and trotted SW.

Part 3 coming soon!

Wednesday, 26 August 2020

Mokra 1939 - part 1


Mokra is a battle which has long interested me, so it was only a matter of time before I revisited it for a WW2 Brigade Commander game.  Getting the terrain right was tricky - I tried three versions of the layout before I was happy with it.  Mokra, for those of you unfamiliar with the battle, was fought on 1st September 1939 between the Wolynska Cavalry Brigade (plus some hangers-om) and most of 4 Panzer Division.  It wasn't the walk-(or rather drive-) over that the Germans were expecting.  Part of the appeal of the battle is the variety of kit.  In the grey corner all the trappings of what will soon be called Blitzkrieg - two Panzer regiments, motorised infantry and dive bombers.  Versus horse cavalry (mostly fighting on foot), tankettes and an armoured train!  The latter can be seen in the first two photos.  It's the Heroics & Ros model (I've had it for ages but only painted it at the weekend) which fits nicely on my plastic Bandai ZZ Gauge track.

As regards the other toys, the Germans are mostly H&R with some Scotia Panzer I.  Scotia also provided the Polish cavalry. Polish vehicles & guns are a mix of the two manufacturers.  All infantry and gun crews are H&R.


The field of battle.  Each hex is c800m.  The railway runs on an embankment which blocks line of sight.  The players were as follows:
Germans - Martin (acting DHQ and Pz Rgt 35, Simon (Schtz  Rgt 12), Pete (Pz Rgt 36)
Poles - John (Brigade HQ & reserves), Jerry (19 & 21 Uhlan Rgts, AT Battery), Graham (Armoured Train 35 Smialy).  Broadly the Germans need to get off to the east, while the Poles need to maintain road & rail links from N to S.
I ran the game and players joined via Zoom.


The game commenced at 1000 or after the first panzer attack, so some of the units of PzRgt35 were already a bit shot up.  In turn 1, the panzers again surged forward, overran the cavalry from 21st Uhlan Rgt in the now empty hex centre right but suffered in the process, so they and their chums further north fell back in a disorganised state. The Polish AT battery bottom right proved very dangerous.
2nd Mounted Rifles Rgt moves up east of the railway.  The Brigade had four cavalry regiments, each represented in the game by two stands.
The defenders of Klobuck look on in wonder as John's armoured striking force trundles past.  A squadron each of TKS tankettes and w34 armoured cars.
An overview.  Pz Rgt 36 has arrived in the West.  As the train puffs north....

The Polish er 'armour' crosses the railway and advances to the West.
The Mounted Rifles arrive in Mokra II 
A tank battle!  Well nearly.  The opportunist Poles seize the opportunity to kick I/Pz Rgt 26 when it's down.  This splendid Polish victory is followed by....
...a counter attack by the now very cross II/Pz Rgt 36...
...and the battered Poles are driven off.  Entertainingly, this left the panzers within range of the armoured train which promptly pasted their positions with 75mm shells.
Turn 3.  After the panzers broke into the positions of the by now rather battered 21 Uhlan Rgt (that's them with a single stand weighed down by a casualty marker and a disorganisation marker...) the 12 Uhlan Rgt did the only sensible thing and charged the tanks!  If only there was an Italian journalist in site to report this.
Excitingly, the Poles had the better of the assault and panzer numbers dwindled accordingly.  At this thrilling point Simon finally joined us, having been delayed by house building matters and with everything still to play for we drew a veil over proceedings until the following evening.


Friday, 5 June 2020

Don't Cry For Me - the truth at last! Falklands War Matrix Game - part 2

Here is the narrative of events from the game.

Turn 1

UK Task Force 1 sets sail for South Atlantic.  US agrees to provide satellite imaging of MEZ.  Argentina agrees to abide by Resolution 502 if UK ceases military preparations.  Chile declares neutrality and sends submarines to sea…

Turn 2

HMS Conqueror patrols with orders to sink Argentine warships breaching the MEZ.  TF1 arrives in S Atlantic.  Perez De Quela engages in intense but unsuccessful shuttle diplomacy.  US Sixth Fleet exercises in Med distract Soviets.  Chile stays neutral.

Turn 3

US releases UK-based stores to UK military.  UK TF2 sails.  Galtieri declares his own ‘Zona de Exclusion Maritima’ around Las Malvinas.  Haig emerges from his private jacuzzi and visits Argentina to urge restraint.  Chile stays neutral.

Turn 4

US offers financial aid to Chile which is spent on extended manouevres on the Argentine border.  UK TF1 & TF2 rendevous in S Atlantic and move to NE of MEZ.  PDQ proposes a UN-sponsored Colonial Evaluation Process to investigate other small islands.  A small detachment of Royal Marines re-captures South Georgia.  “Rejoice” says Mrs T.


Turn 5

Haig holds a press conference (in his jacuzzi) to urge peace and gain publicity!  His rubber duck becomes a global media sensation.  PDQ supports call for peace.  Chile continues military exercises and invites in the worlds’ press.  Reagan offers UK the loan of USS Guam if the RN loses a carrier.  While carriers and escort linger in NE of MEZ, 3 Cdo Bde and 5 Inf Bde are landed at Goose Green under Sea Harrier cover.  RAF Vulcans (‘one’ according to UK ministry of defence, ‘thousands’ according to Galtieri) bomb the runway at Port Stanley.

Turn 6

British troops encounter Argentine defences in E Falkland and are hampered by poor weather.  Massive Argentine air raids sink an RFA a frigate and a Type 42 destroyer in Falkland Sound, while Exocets fired from Etendards badly damage the Atlantic Conveyor.  Chile requests helicopters from US in order to be ready for air sea rescue missions.  Pinochet especially requests AH-1 Cobra gunships as they are apparently especially suitable for the role…

Turn 7

3 Cdo Bde (“the best troops in the world”) defeats Argentine forces in E Falkland.  5 Bde advances on Port Stanley.  Haig licences rubber duck production and arrives, at Pinochet’s invitation, in Chile to meet the press and sample another jacuzzi.  Galtieri holds a press conference – Argentine destroyers are dispatched to Southern Ocean and border defences against Chile are strengthened.  Chile remains neutral.

Turn 8

Argentine morale on Falklands starts to collapse and while fighting continues in remote areas, Scots Guards enter Port Stanley and haul down the Argentine flag.  The Junta withholds the truth from the populace and a mass rally in Buenos Aries supports Galtieri.  Pinochet is awarded the Chilean Humanitarian Star.  He and Haig appear on the cover of Time magazine, hailed as men of peace and restraint.

So a broadly historical outcome which remained far from a forgone conclusion right to the end.  In turn eight, there were three arguments which basically said the Brits got to Port Stanley.  Two of them failed....

Thursday, 4 June 2020

Don't Cry For Me - the truth at last! Falklands War Matrix Game - part 1

This week's game was another outing for my Falklands War Matrix Game - 
Don't Cry For Me, or how I stopped worrying about the bomb and learned to love penguins
Originally unleashed in 2000, I last ran it to mark the 25th anniversary of the conflict in 2007 and it has subsequently been included in this book:
If you'd like to have the full details of this game and several others you might care to speculate £12.95 on a copy here.My memories of the original game can be found here.
------------------------------------------------------------------
It is early April 1982.  A few days ago, Argentine forces invaded the Falkland Islands, which the Junta claims are the Islas Malvinas, historically part of Argentina.  The United Nations has passed Resolution 502 calling for the withdrawal of Argentine troops.

A British task force is being readied and it’s first units, including elements of the Parachute Regiment and Royal Marines, are ready to sail for the South Atlantic.  The British Government has declared a Maritime Exclusion Zone (MEZ) around the Falklands.
The game lasts up to eight turns, each representing approximately 10 days. 

Entity
Character
Player
1
UK Government
Mrs Thatcher
John
2
Argentine Junta
General Galtieri
Martin
3
US President
Ronald Reagan
Pete
4
UK Task Force
Rear Admiral Woodward
Simon
5
Chile
General Pinochet
Richard
6
United Nations
Perez De Quela
Tim C
7
US State Department
General Haig
Graham

The (rather stylised) map was drawn on two sheets of flip chart paper.  Military units were represented by various boardgame parts.
Having set the scene, a future post will present the narrative of events.

Tuesday, 26 May 2020

Plugging the Gap - part 4

As we return for the final instalment of the action the US position on Hill 401 looks increasingly precarious.
At the autobahn junction Richard's tank battalion looks well placed to fend off a T-64 battalion -  even with the RHQ in attendance.
Further south, the tank btl from the MRR seems poised to outflank the US renmants.
Having seen off the T-64 attack, Hill 403 receives some unwelcome attention from the MiG-27s.
As Tim's battered M-113s scuttle out of the woods they run into advance elements of the MRR
Martin was having a lovely time sorting out the traffic jam
Just south of Fulda the Cobras had another go but missed!
In desperation, lacking functional tank battalions and no doubt mindful of the looming presence of the Division Political Officer Simon committed his motor rifle battalion...
...which to everyone's surprise overran the M-60 companies.  Crushing the Polizei VW seemed a bit unsporting though!
This meant that Soviet hopes now rested on Martin's broad shoulders as his tank and MR battalions rushed to exploit the breach
Endex.  There were sufficient Sov tank/MR btls to get at least two off down the A66 towards Frankfurt and next to nothing the Yanks could still do about it.  A solid Soviet victory marred by the piles of burning T-64s....
Interestingly, the game ran for a similar number of game turns and took up almost exactly the same real time as the earlier game.  So as long as everyone is on the case it was just as slick with six players as two.  Well done everyone!