As many readers will know, Sheffield Wargames Society meets on a Wednesday. Therefore our nearest meeting to the D-Day anniversary was last night (the 5th). John had prepared a game about the assault on Pegasus Bridge and had even gone to the trouble of scratchbuilding both the bridge and the local chateau in 1/300 scale, with the rest of the toys from his 15mm collection. Our briefings were based closely on the information provided to Major Howard, the CO of the operation.
We had six Horsa gliders each carrying a small (c20 man) platoon and a 5 man Royal Engineer detachment.
John ran the game. The players were me, Richard and (in the photo) Jerry, Tim C and Martin. John, Jerry and Martin sported very smart red berets. Lacking such headgear, I wore my Catering Corps beret.
I'm no good in a fight but I make a great pot of tea...
See also Richard's report
here.
To keep things simple we numbered our platoons 1-6 and allocated missions for each. Everyone was. however, briefed on all of the missions so platoons could be easily re-ordered once on the ground. If we survived that long. The landing would take place in pitch darkness.
To help with orientation, most of my photos were taken from the NE corner of the table.
The missions were:
1. Take the bridge(!), sappers to neutralise any demo charges and make safe. (1 Plt - Jerry)
2. Take the pillbox N of bridge (suspected to be the control point for the demo charges). 2 Plt (me)
3. Clear the East Bank (3 Plt - Richard)
4. Secure the defensive works (5 Plt - Tim C)
5. Take Ranville Bridge (just off-table on the road to the East) (4 & 6 Plts - John & Martin)
First though, we had to build and land our gliders....
1 Plt and Maj Howard prepares to land (the white pipe cleaners mark the LZs - 'X' in the South, 'Y' in the North.
And he's down. A well-aimed landing by Jerry!
Richard's 3 Plt touches down
Tim C's 5 Plt lands
A couple of photos now on my own creation which, if I say it myself, flew and landed beautifully!
I even added some 'period' markings...
All 5 gliders (1/300 models provided by me) on the ground. Only five? Well yes. 4 Plt was last seen heading well to the East....
My toys, so I chose the artistically crashed model. These Horsas have been around since the mid-1980s and were originally owned and painted by my old friend Scott P.
We stumbled out of the gliders...
...and got ourselves organised for our missions.
Some German MG42 fire was swiftly dealt with (the chaps on the far side of the canal) and many of the foreign (Italian, Polish etc) conscripts fled.
The East bank and the bridge were quickly secured, and a platoon pushed forward to secure the west.
As we sorted out a defensive perimeter, noises were heard.....
...and a couple of tanks rumbled very slowly down the road towards us. While each glider had been loaded with a PIAT and a stock of Gammon Bombs, only two of the former had survived the landing and none of the latter could be found!
After some anxious moments the fourth(!) PIAT round struck home. Having all the players shout 'twang' seemed to make all the difference to the die roll. (The PIAT being a spring-powered device). The other Panzer buggered off at this point and we settled in to await the arrival of 6th Airborne Div and/or Lovat's Commandos.
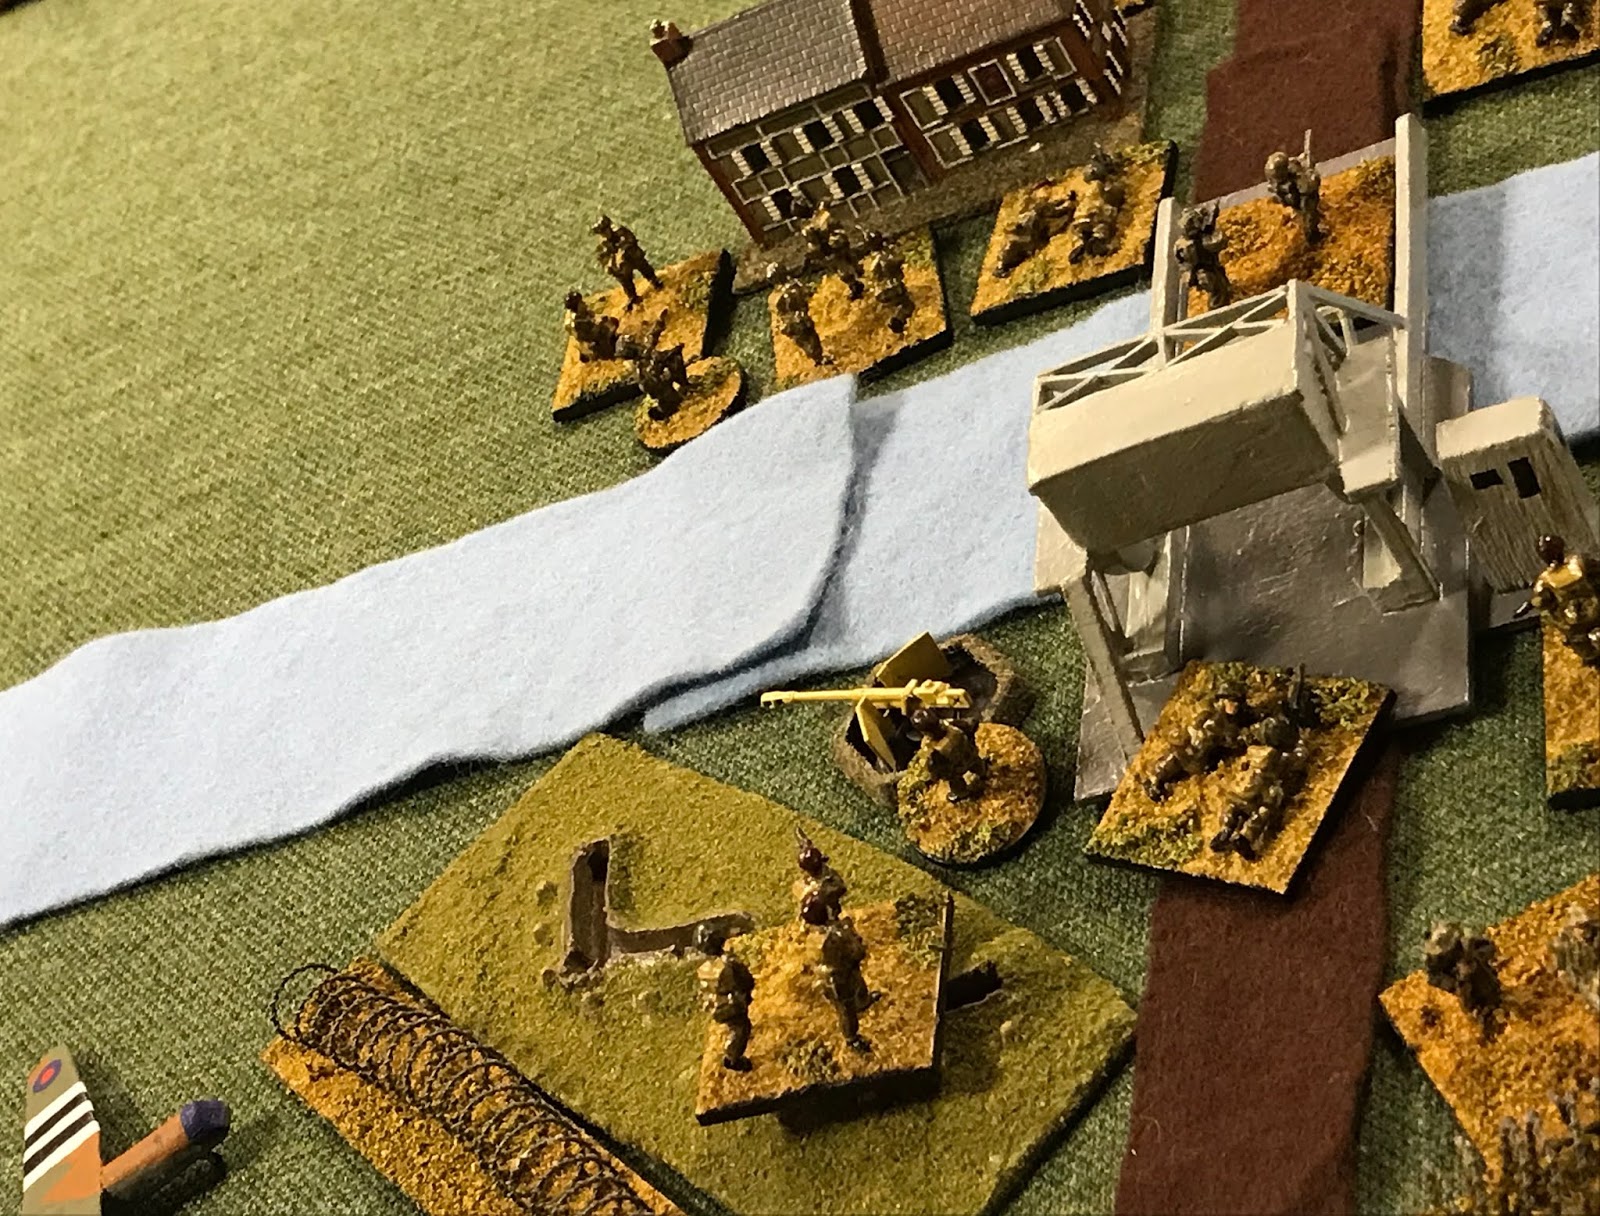
A German patrol boat appeared from the North and was dealt with. Then as it git light we came under distant sniper fire. The captured AT gun next to the bridge was brought into action but shelling the chateau led to no slacking of sniper activity. A couple of rounds at the nearby water tower seemed to do the trick though!
Eventually British armour appeared from the North and Lovat, led by his piper from the East.
Our work here was done. A well-researched and run game from John, helped enormously by the good-natured role playing of the players.
Our own very modest contribution to the D-Day commemoration.