Fired with enthusiasm following the success of my Bf 110 build during the Christmas break, I dug out a part built Mystere with a view to completing it. This is the old Matchbox kit (in Revell packaging) and it's arrival in my possession is (appropriately) shrouded in mystery. The basic components (fuselage, wings, tail) had already been assembled - and not too well - so I swiftly completed the build and then set to with the painting.
The two sets of markings supplied with the kit (French and Indian) both required a plain metal finish, so it was out with the silver paint - and then the problems began. Silver is always a tricky colour on a large surface and the paint I used left horrible streaks. Disheartened by this and distracted by the usual plethora of other projects, the Mystere was then left to gather dust. Due to my meanness I couldn't abandon it altogether and so I had another go at the weekend. I tested the various silver paints I have and settled on a long forgotten pot from Games Workshop. After two coats this gave a tolerable finish and I was then able to press on with the (very limited) detail painting. I settled on the Indian markings as I have an interest in the wars fought between Indian and her neighbours since independence.
The end result isn't great, but as free models go it'll do. I wonder if I'll ever use it in a game...
 |
Dramatic front-on view. The Mystere looks broadly similar to a number of it's contemporaries. |
 |
The green centres in the roundels were separate decals and were a bugger to place accurately - as can be plainly seen! |
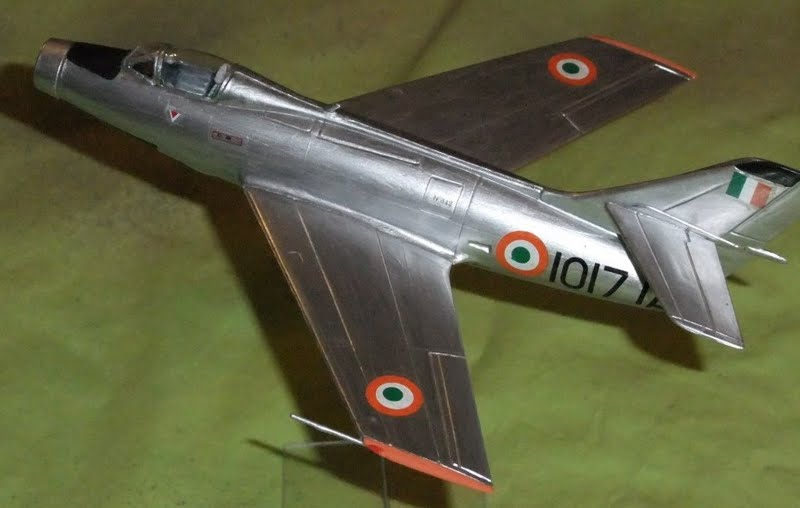 |
| Sadly there was no pilot figure with the kit - and nothing suitable in the spares box. |
10 comments:
Very nice.
Silver is tricky indeed, but you have done a good job. I too have found that gw silver is more decent than most.
I have several old 1/72 aircrafts that I plan to restore for wargame use. Though I can't figure any cheap and effective way for basing them. What did you use?
Giano
All my 1/300 and 1/144 aircraft have holes drilled in the fuselage to accept a stand. The stands are made from a square of acetate sheet (cut from bigger sheets available in DIY stores) and a piece of thin steel rod.
Good skills. I tend to stay away from anything sliver so you are a brave man in my mind.
I have always wanted to make the entire Century series of US aircraft, but the sliver issue has always reared its head putting me off.
Nice work.
nicely done! I've always had issues with plain metal finish
on aircraft, I usally opt for
some sort of camo job.
Paul
Thanks, but I don't think I'll be rushing to build anything else in 'bare metal' in this scale. There's is that 1/100 Lightning though.....
Don M
I can well understand why!
West1871
Thanks for the tip about Revell paints - I might give them a try. I can't understand why decals are suddenly multiple-part. It wasn't like that in the '70s......
That is a nice kit Tim and you finished it well. I'd like to see the Lightning at some stage, and absolute classic of that era
Al
Thanks - it doesnt look too bad. The Lightning was (surprise surprise) an impulse buy, made for no better reason than I like 'em.
Tim,
I realise this is a bit late(!) However, for an easy to apply polished metal effect, I'd suggest Humbrol Enamel Polished Metals (steel/aluminium). Stick it on, wait til it drys and polish it with a soft cloth. Gives an excellent result.
Post a Comment